The BindTuning Accessibility Tool can be uninstalled following two distinct methods:
- Manual Uninstallation;
- Automatic Uninstallation.
Manual Uninstallation
1. Deactivate and delete the tool on SharePoint:
-
On your root site open the Settings menu and click on Site Settings;
-
Under Web Design Galleries, click on Solutions;
-
Select BTAccessibilityTool_x.x.x.x.wsp file, and click on Deactivate;
-
Select BTAccessibilityTool_x.x.x.x.wsp file again, and click on Delete.
2. Finishing off:
Only a few more steps to completly remove and uninstall your tool.
- Open your site with SharePoint designer and open All Files;
- Open your Style Library.
- Delete the folder BTAccessibilityTool.
Success: You have now successfully removed and uninstalled your tool.
Automatic Uninstallation
Inside the tool package, you'll find the installer_BTAccessibilityTool.ps1 PowerShell script, which will automatically remove and uninstall the solution in the required site collection.
-
Right-click on the file and select the option Run with PowerShell;
-
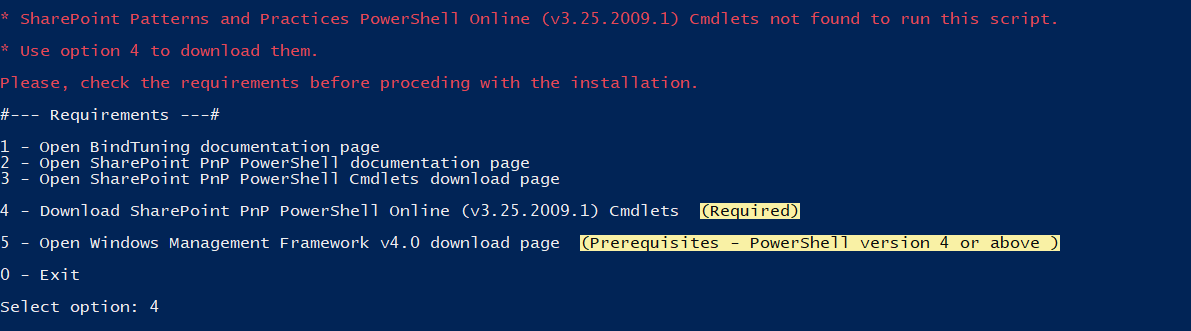
If prompted, download the required Cmdlets, in order to proceed with the installation;
-
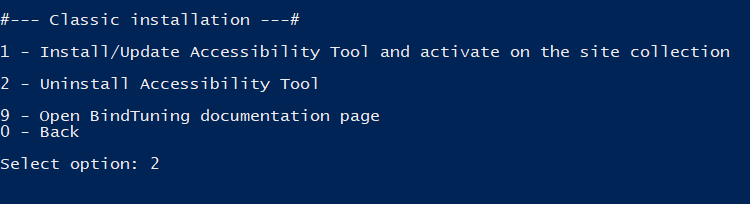
Select the Classic option and, hit Enter;

-
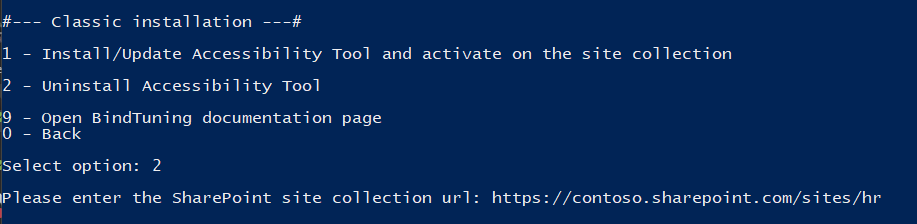
Select the option Uninstall Accessibility Tool and hit Enter;
-
Input the corresponding site collection where the product is to be installed and hit Enter;
-
If prompted, input your Office 365 credentials;
-
The process will run automatically.
The tool has been uninstalled! ✅