Installation
On Classic environments, BindTuning offers two distinct deployment methods.
-
Upload the Solution: Comprises the upload of the solution to your Solutions gallery and subsequent activation.
-
Installation script: Performs the necessary steps (deployment and activation) automatically.
Note: Only one of the methods need to performed.
Upload the Solution
Inside your tool's classic folder you will find a .wsp file which you will be using for installing the tool.
- Open your SharePoint Site;
- Click on Settings ⚙️ and then on Site settings;
-
Under "Web Designer Galleries", click on Solutions;
Note: If you're not working on your root site this option will not appear.
-
Click on Upload Solution;
- Upload the BTAccessibilityTool_x.x.x.x.wsp file. You can find the file by opening your tool's pack and the classic folder;
- Click OK;
- Click on "Activate" to activate the tool.
The tool has been installed! ✅
Installation script
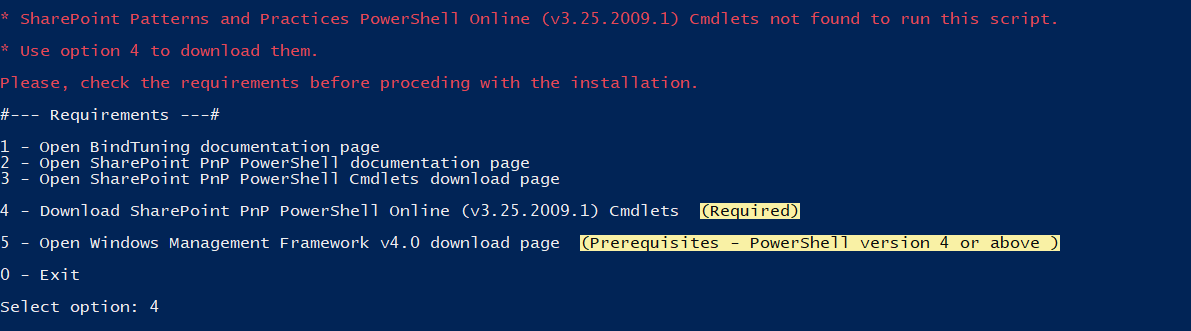
Inside the tool package, you'll find the installer_BTAccessibilityTool.ps1 PowerShell script, which will automatically deploy and apply the solution to the required site collection.
-
Right-click on the file and select the option Run with PowerShell;
-
If prompted, download the required Cmdlets, in order to proceed with the installation;
-
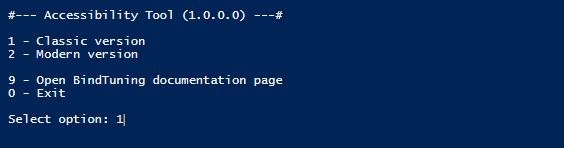
Select the Classic option and, hit Enter;
-
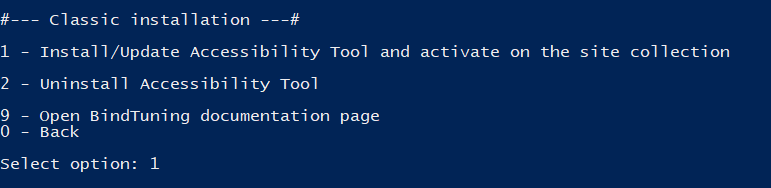
Select the option Install/Update Accessibility Tool and activate on the site collection and hit Enter;
-
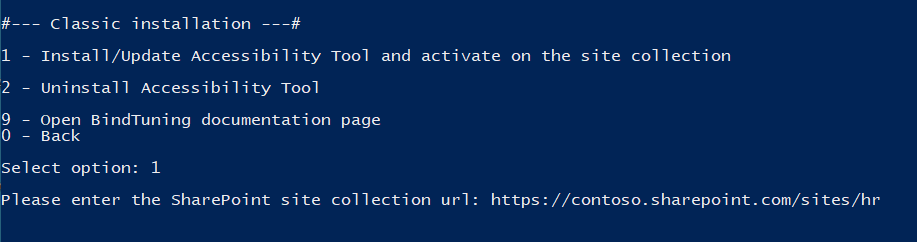
Input the corresponding site collection where the product is to be installed and hit Enter;
-
If prompted, input your Office 365 credentials;
-
The process will run automatically.

The tool has been installed! ✅